If you’re using WordPress and want to improve how you track website activity like form submissions, purchases, button clicks, or page views then Google Tag Manager (GTM) is one tool you shouldn’t ignore.
GTM lets you add, edit, and manage all your tracking tags in one place without having to touch your website’s code every time. Whether you’re running Google Analytics, Facebook Pixel, or custom event tracking, GTM makes your life easier and your data cleaner.
In this guide, we’ll walk you through two simple ways to install Google Tag Manager on your WordPress website:
- Manual theme edit – perfect for developers
- TagSyncer plugin – the faster, smarter approach fully designed for WordPress
Both methods work well; it just depends on your comfort level and how much control or automation you need.
What You’ll Need:
Before we start, make sure you have the following:
- A free Google Tag Manager account
- Access to your WordPress admin dashboard
- (Optional) A TagSyncer account if you want to skip the code and do it faster
Step 1: Set Up Your Google Tag Manager Account
To use GTM, you’ll first need to create an account.
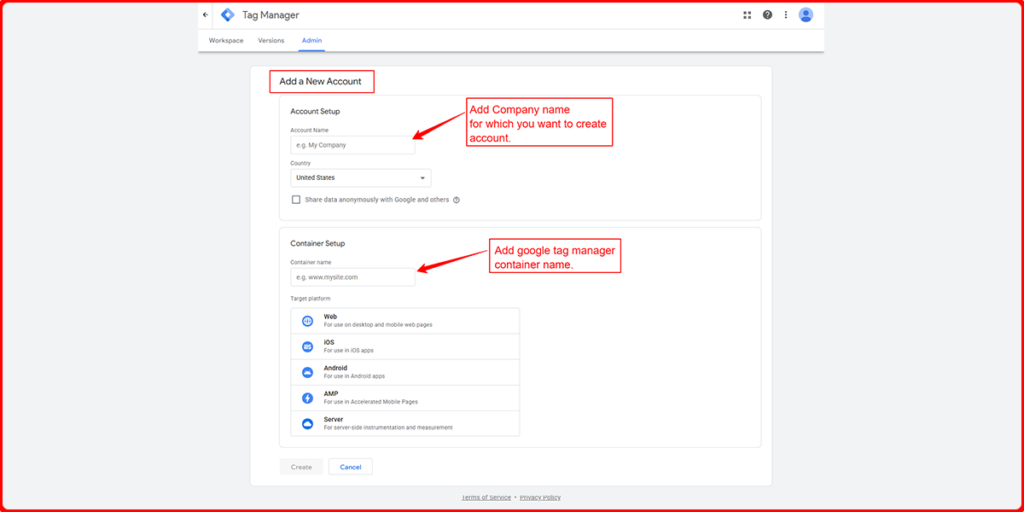
- Go to https://tagmanager.google.com
- Click on “Create Account”
- Enter your account name (e.g., your business name)
- Enter your website’s domain name as the container name
- Choose Web as the target platform
- Click Create and agree to the terms
Once created, GTM will give you two code snippets:
- One for the <head> of your site
- One for right after the opening <body> tag
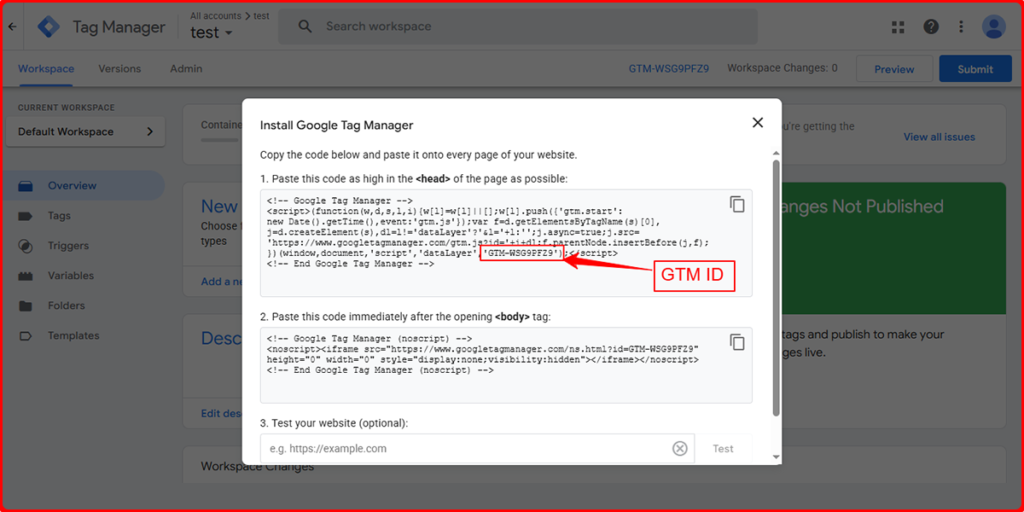
These snippets are what connect your website to your GTM container.
Method 1: Add GTM to WordPress Manually (No Plugin Required)
If you want a lightweight setup without installing any extra plugins, you can add the GTM code directly to your WordPress theme. This is a good option for developers or users who are comfortable with basic code edits.
Important: Before editing theme files, we recommend backing up your site or using a child theme to avoid losing changes during theme updates.
Step-by-Step Instructions:
1. From your WordPress dashboard, go to
Appearance → Theme File Editor
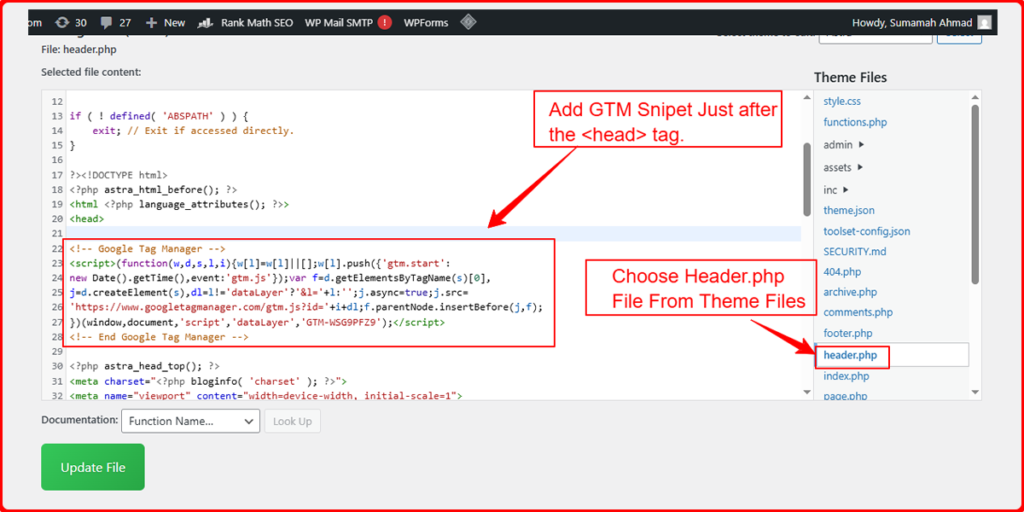
2. In the right sidebar, open the file called header.php
3. Look for the closing </head> tag.
Paste the first GTM snippet (head code) just before it
4. Then, locate the opening <body> tag.
Paste the second GTM snippet (body code) immediately after it
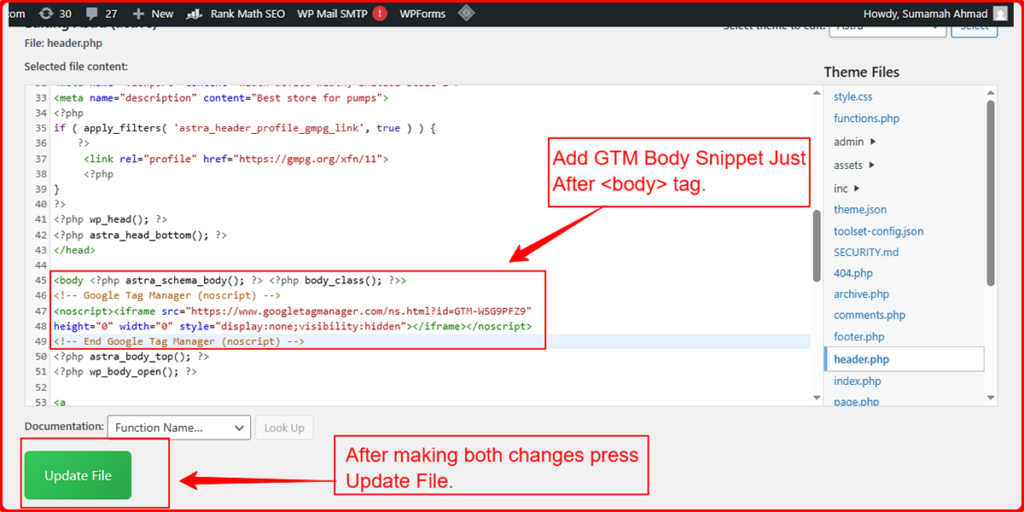
5. Click Update File to save your changes
That’s it! Your Google Tag Manager container is now installed manually.
Benefits of Manual Installation:
- Doesn’t require a plugin
- Cleaner and lightweight
- Gives full control over placement
- Ideal for developers or custom WordPress themes
But if you want something even easier, no code, no plugins read on.
Method 2: Install GTM Easily with TagSyncer
Instead of dealing with code or multiple plugins, use TagSyncer a powerful WordPress plugin by Involvz that takes care of everything for you.
What TagSyncer Can Do:
- Manage up to two GTM containers directly from your dashboard
- Track scroll depth, forms (Contact Form 7, Elementor), and WooCommerce events
- Send notifications if a GTM ID is accidentally removed
- Automatically handle dataLayer events, so you can build custom tracking tags with ease
Why Choose TagSyncer?
- No manual code edits
- Advanced event tracking built-in
- Peace of mind with ID removal alerts
- Full support for WooCommerce, forms, and scroll tracking
How to Install TagSyncer:
1. Go to Plugins → Add New and search for TagSyncer
2. Click Install, then Activate
3. Navigate to Settings → TagSyncer
4. Enter your GTM container ID(s) (e.g., GTM-XXXXXX)
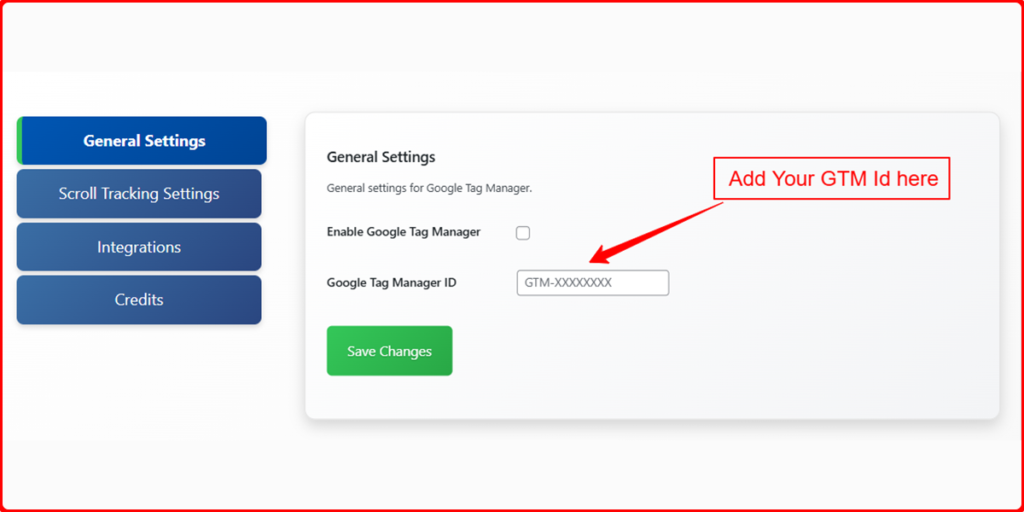
5. Enable tracking options based on your needs:
- Scroll Depth
- Contact Form 7
- Elementor Forms
- WooCommerce Events
![]()
6. Click Save Settings — TagSyncer handles the rest!
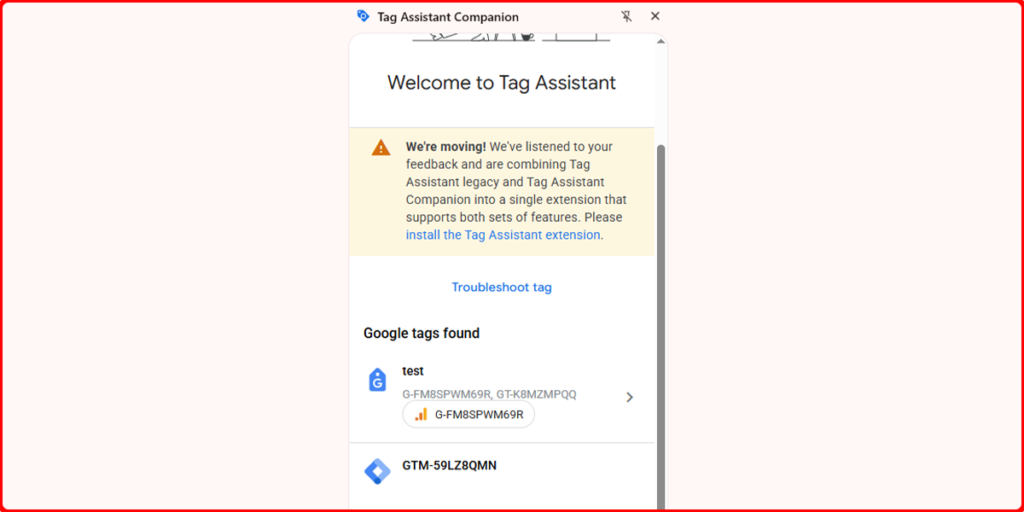
Verifying Your Setup (Both Methods)
To make sure GTM is installed correctly:
- Visit your website and open View Page Source
- Press Ctrl+F (or Cmd+F) and search for your GTM ID
- You can also use Google’s Tag Assistant Chrome extension for a quick check
Enhanced Tracking with TagSyncer
Once active, TagSyncer automatically tracks user interactions like:
- Scroll engagement (e.g., reading behavior)
- Form submissions for Contact Form 7 & Elementor
- WooCommerce activity (product views, add-to-cart, purchases)
- Custom dataLayer events for tailored tracking setups
You don’t need extra plugins or custom scripts—just toggle what you need and data starts flowing instantly.
Final Thoughts
Adding Google Tag Manager to your WordPress site is one of the most important steps for improving how you track user behavior, measure campaigns, and manage website analytics all without bloating your site with multiple tracking codes.
You have two clear options:
- If you’re comfortable editing your theme files and want to avoid plugins, the manual method is a solid and clean approach. It works great for developers or those managing a single site.
- But if you work with multiple websites, use GTM frequently, or want a faster, automated, and error-free process TagSyncer is the better choice. It’s built to simplify your workflow and give you more control over your tracking setup.
With TagSyncer, you’ll not only install GTM quickly, but you’ll also save hours managing containers, syncing tags, and scaling GTM across your digital stack.
Whether you’re a solo marketer, part of a digital agency, or managing an in-house analytics setup. TagSyncer makes Google Tag Manager smarter, faster, and easier.
Ready to try it? Get started with TagSyncer today no code, no hassle, just results.